# MeshKernelPy
[](https://sonarcloud.io/dashboard?id=Deltares_MeshKernelPy)
[](https://badge.fury.io/py/meshkernel)
`MeshKernelPy` is a library for creating and editing meshes.
It supports 1D and 2D unstructured meshes.
The underlying C++ library `MeshKernel` can be found [here](https://github.com/Deltares/MeshKernel).
# Installation
The library can be installed from [PyPI](https://pypi.org/project/meshkernel/) by executing
```bash
pip install meshkernel
```
Under Windows, If you encounter any issues importing the pip wheels, you may need to install the [Visual C++ Redistributable for Visual Studio 2019](https://docs.microsoft.com/en-us/cpp/windows/latest-supported-vc-redist?view=msvc-170).
# Examples
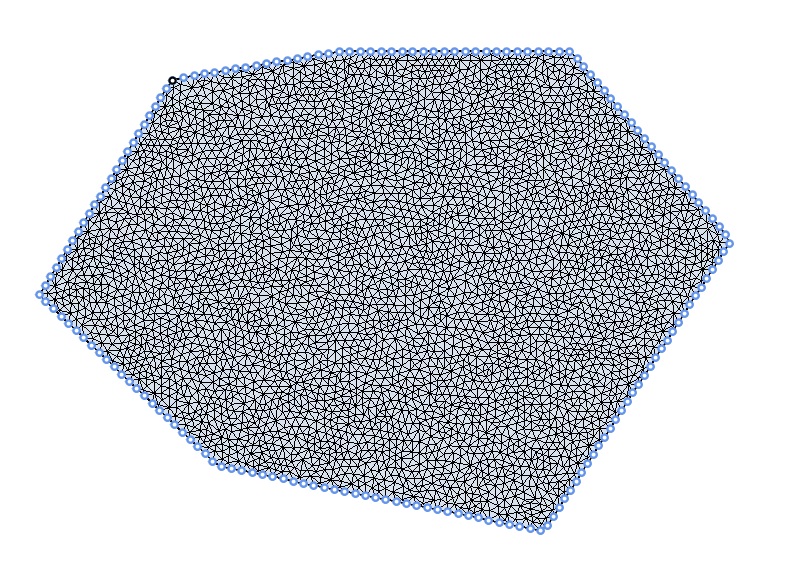
## Creating a triangular mesh inside a polygon
In this example a mesh is created by discretizing the polygon perimeter with the desired edge length.
## Mesh orthogonalization
Finite volume staggered flow solvers require the mesh to be as orthogonal as possible.
MeshKernel provides an algorithm to adapt the mesh and achieve a good balance between mesh orthogonality and smoothness.

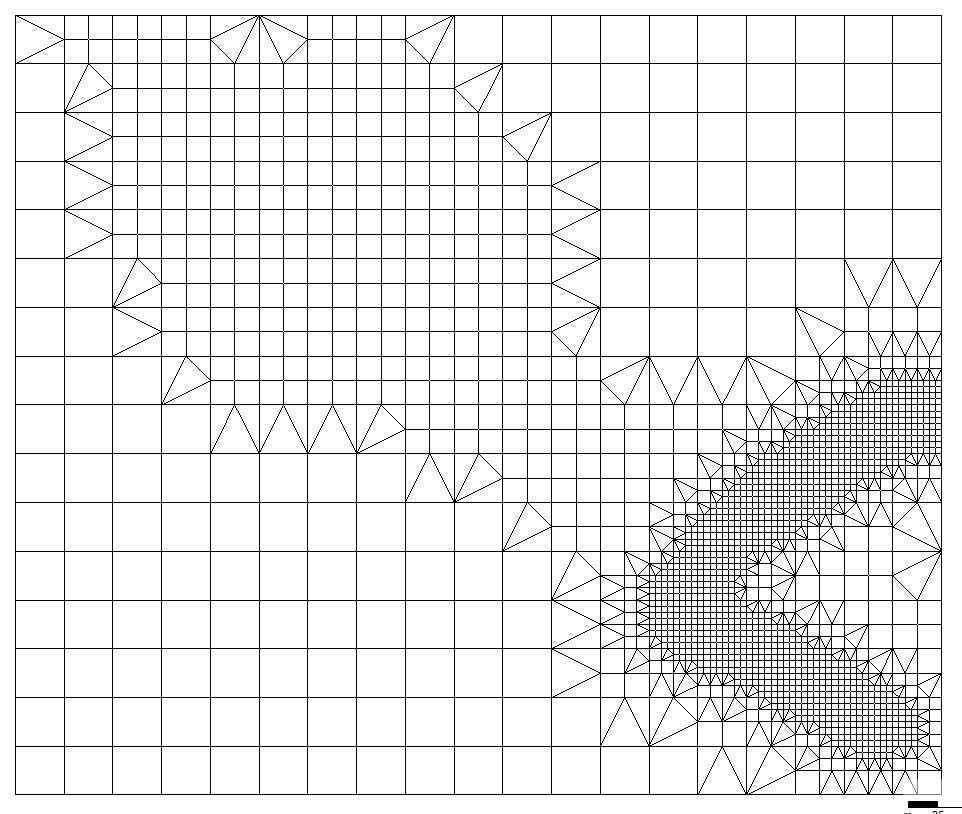
## Mesh refinement
A mesh can be refined in areas based on samples or polygon selections.
# Contributing
In order to install `MeshKernelPy` locally, please execute the following line inside your virtual environment
```bash
pip install -e ".[tests, lint, docs]"
```
Then add a compiled `MeshKernelApi.dll` into your `src` folder.
Also make sure that your editor is configured to format the code with [`black`](https://black.readthedocs.io/en/stable/) and [`isort`](https://pycqa.github.io/isort/).
When modifying `Jupyter` notebooks, the [`jupyterlab-code-formatter`](https://jupyterlab-code-formatter.readthedocs.io/en/latest/installation.html) can be used.
# Building and installing the wheel
## Platform-specific build
A setup script is provided for building the wheel. The script is known to work under Windows, Linux and macOS.
To install the dependencies, use
```powershell
python -m pip install --upgrade pip
python -m pip install wheel numpy matplotlib pytest
```
The environment variable `BACK_END_BRANCH` must be set prior to building the wheel. It specifies which [MeshKernel](https://github.com/Deltares/MeshKernel) branch should be built during the generation of the wheel. If one is on the `main` branch of MeshKernelPy, `BACK_END_BRANCH` must be either set to `master`. If one is an a release branch, `BACK_END_BRANCH` should be set to `release`. The version of the MeshKernel release branch is hardcoded in `meshkernel/version.py`.
While in the project's root directory, to build the wheel use
```powershell
python setup.py build_ext
python setup.py sdist bdist_wheel
```
To install use:
The wheel is installed
```powershell
python -m pip install <meshkernel_wheel_name>
```
where `<meshkernel_wheel_name>` is the name of the generated wheel.
To test, simply run `pytest`.
## Manylinux Docker image
To deploy Linux wheels to PyPI, we provide a Docker image that is based on manylinux_2_28_x86_64.
This image includes cmake and boost, which are necessary for compiling the native MeshKernel library (written in C++).
To build the Docker image, please follow these steps:
```powershell
chmod +x scripts/compile_deps.sh
chmod +x scripts/build_deps.sh
docker build --progress=plain ./scripts -t build_linux_library
```
Once the Docker image has been built, build the linux wheels using the following command:
```powershell
docker run -e BACK_END_BRANCH=<meshkernel_back_end_branch_name> -v $(pwd):/root --rm build_linux_library
```
where `<meshkernel_back_end_branch_name>` is either `master` or `release`, as described in [Platform-specific build](#platform-specific-build).
The deployable linux wheels will be located in dist/wheelhouse
# License
`MeshKernelPy` uses the MIT license.
However, the wheels on PyPI bundle the LGPL licensed [MeshKernel](https://github.com/Deltares/MeshKernel).
Please make sure that this fits your needs before depending on it.
# Documentation
```{toctree}
:titlesonly:
:maxdepth: 1
examples/index
api/modules
```